Since I seem to fall behind on everything in my life (where are my fellow procrastinators??), I decided to get an early start on Thanksgiving. This might be the first year that we get to host a dinner in our little casita.

I bought these baby pumpkins in a set at Big Lots and knew right away that I wanted to paint them gold.
What you will need:
1. Spray Paint – I used gold metallic by Valspar
2. Painters Tape
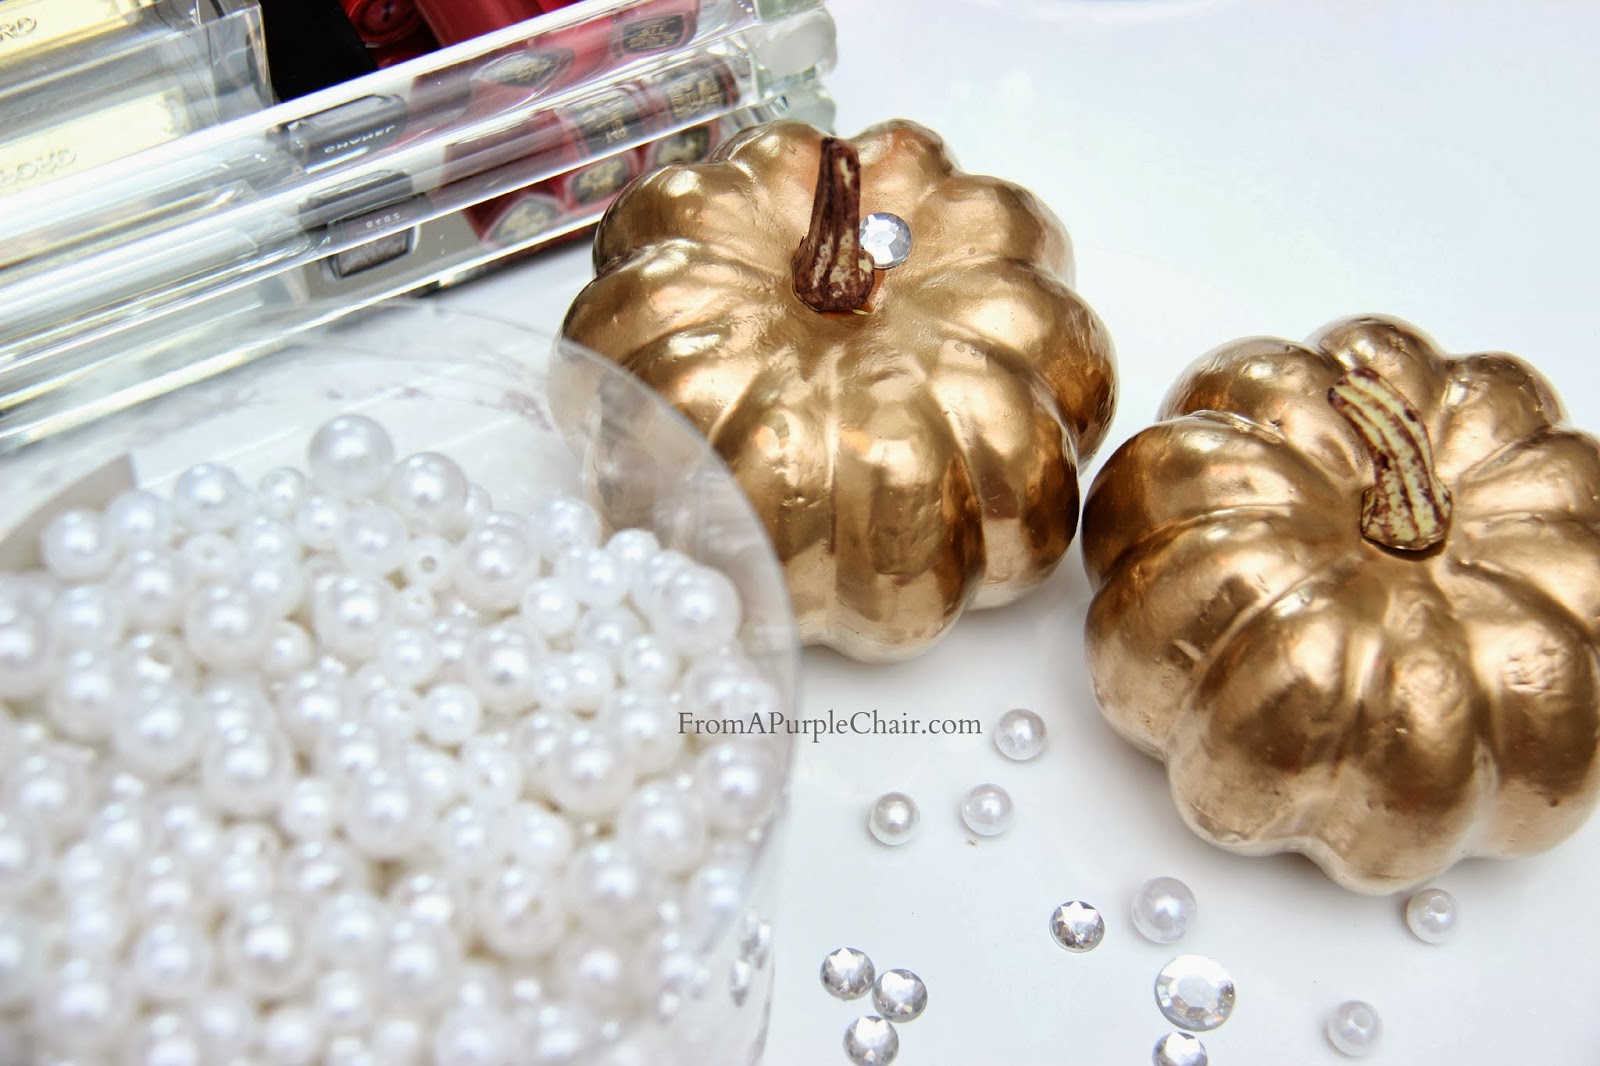
3. Jewels – I used pearls and crystals both purchased from Hobby Lobby (don’t forget to print a 40% off coupon from their website)
4. Glue – I used hot glue but next time I will use E6000 or another type of gem glue because hot glue was too messy
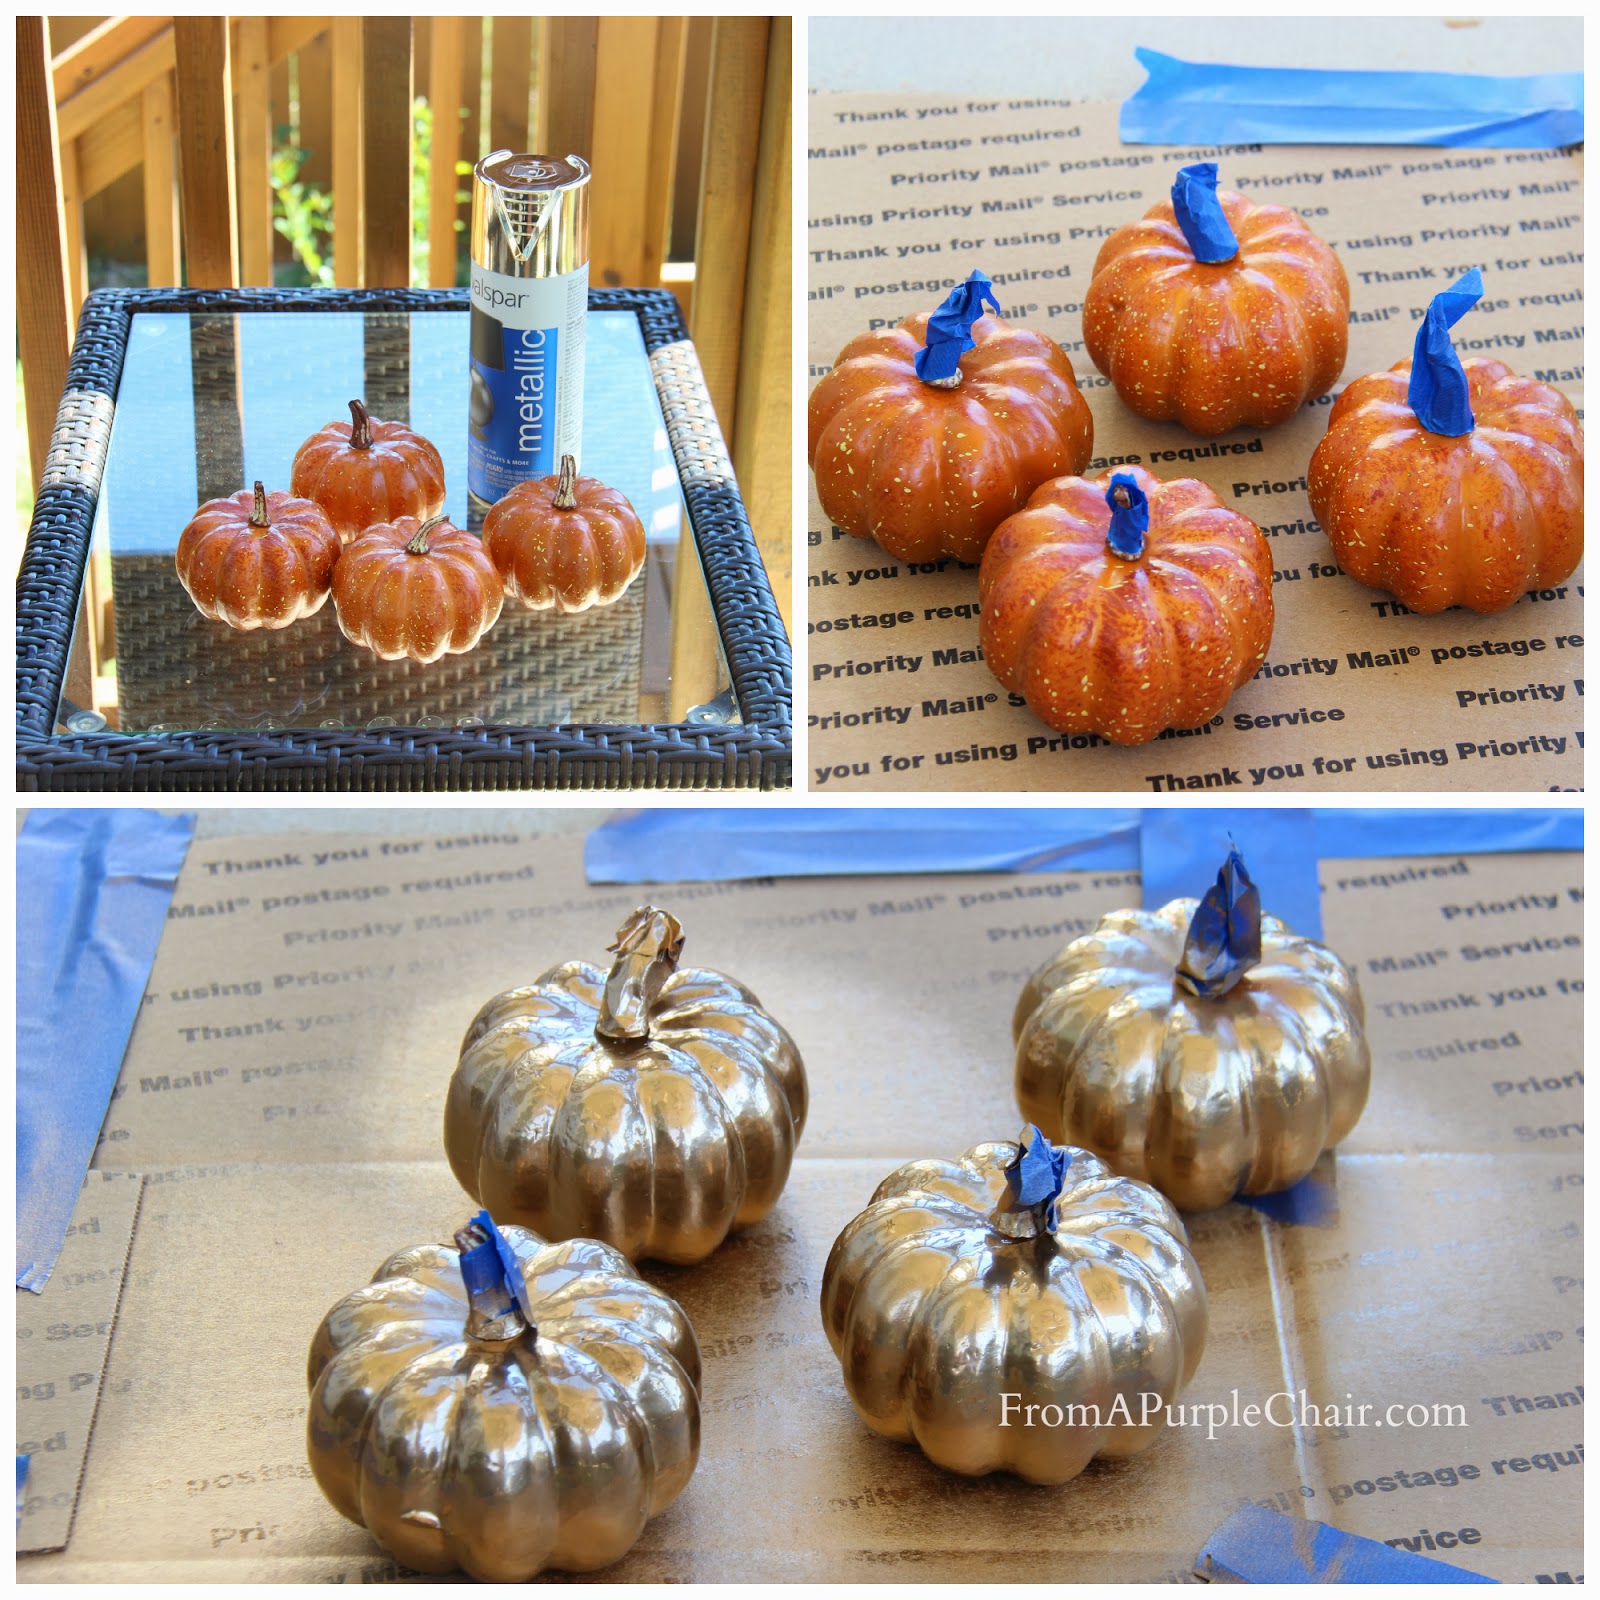
First I put down an old box to protect my patio floor, I couldn’t find any newspaper so I had to improvise. Then I Covered the stems with painters tape (you can skip this step in you want the entire pumpkin gold).
*Tip – if you want the gold to be lighter shade then I would spray paint the pumpkins with a white colored primer before applying the gold paint.
I let them dry for about an hour, although they were probably dry after 20-30 minutes.


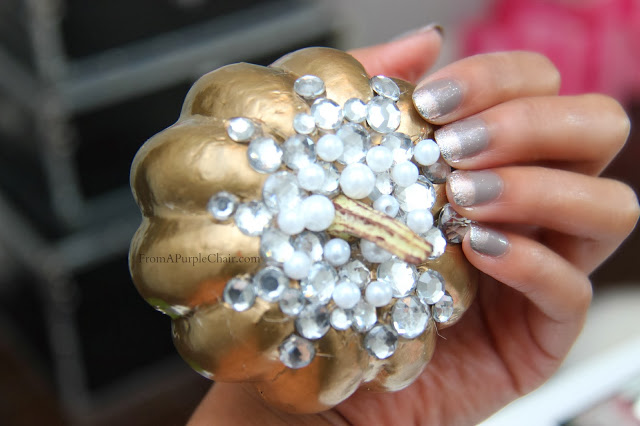
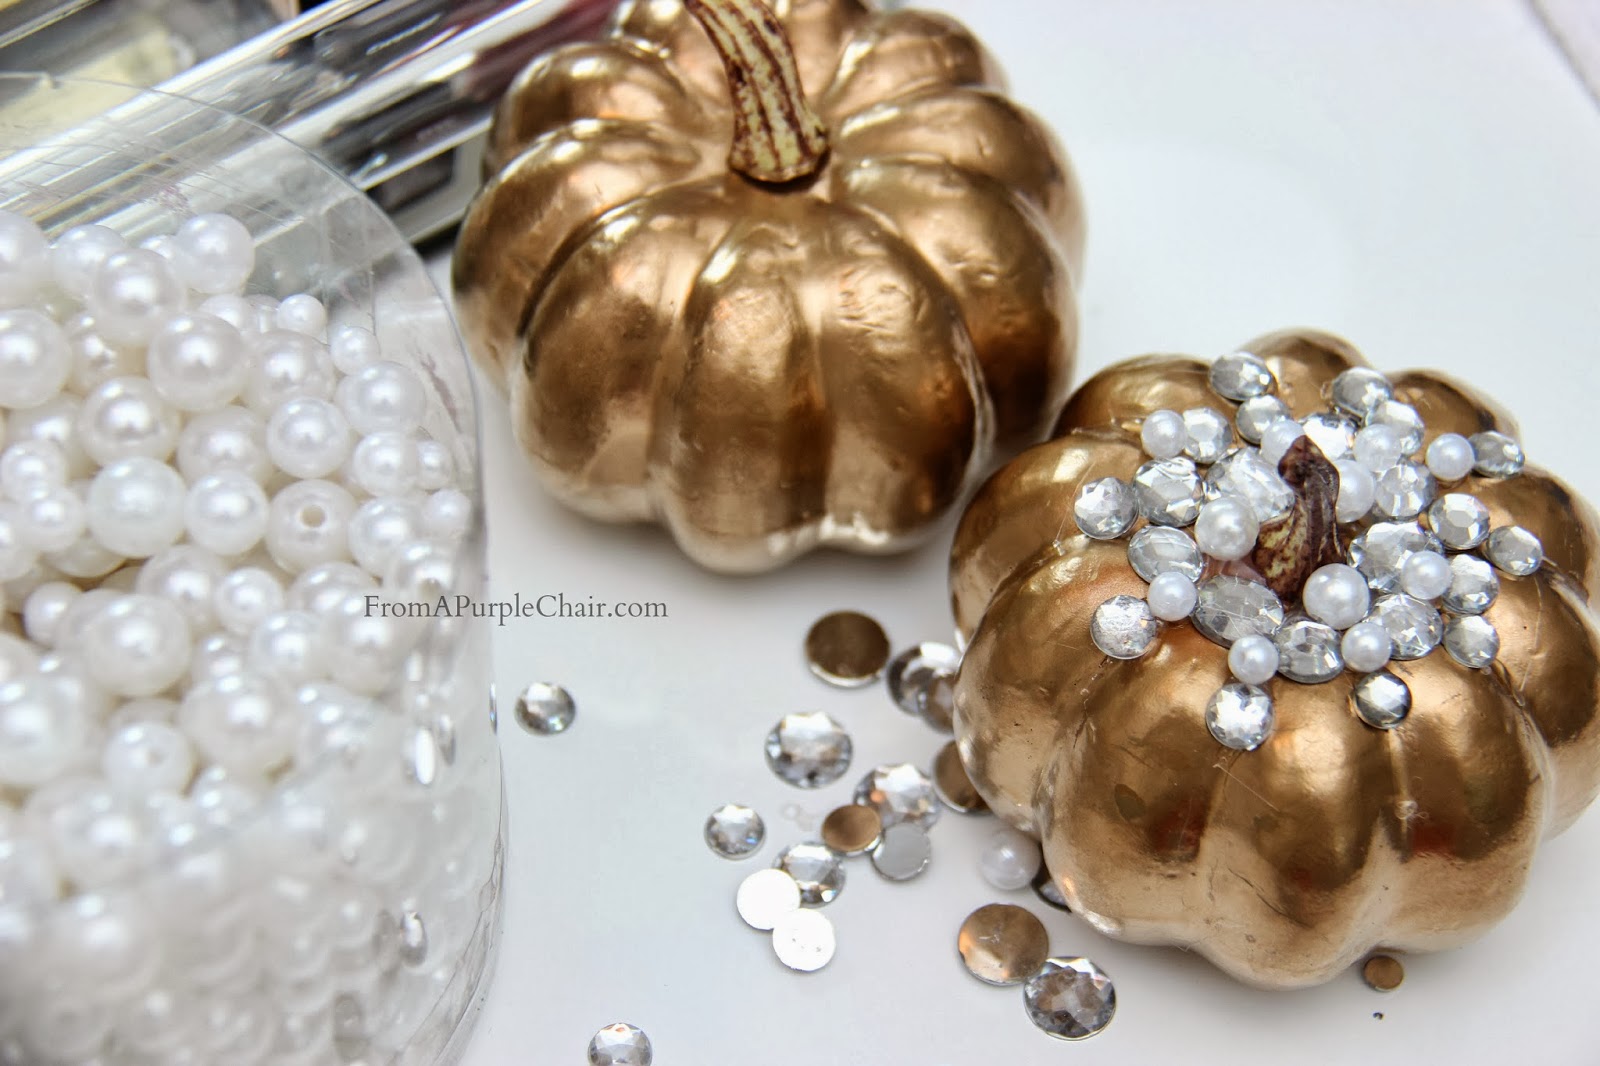
Now comes the fun part – Bedazzling your pumpkins! You can get as creative as you want on this part. I did no particular pattern, I just started near the stem and alternated between pearls and jewels.
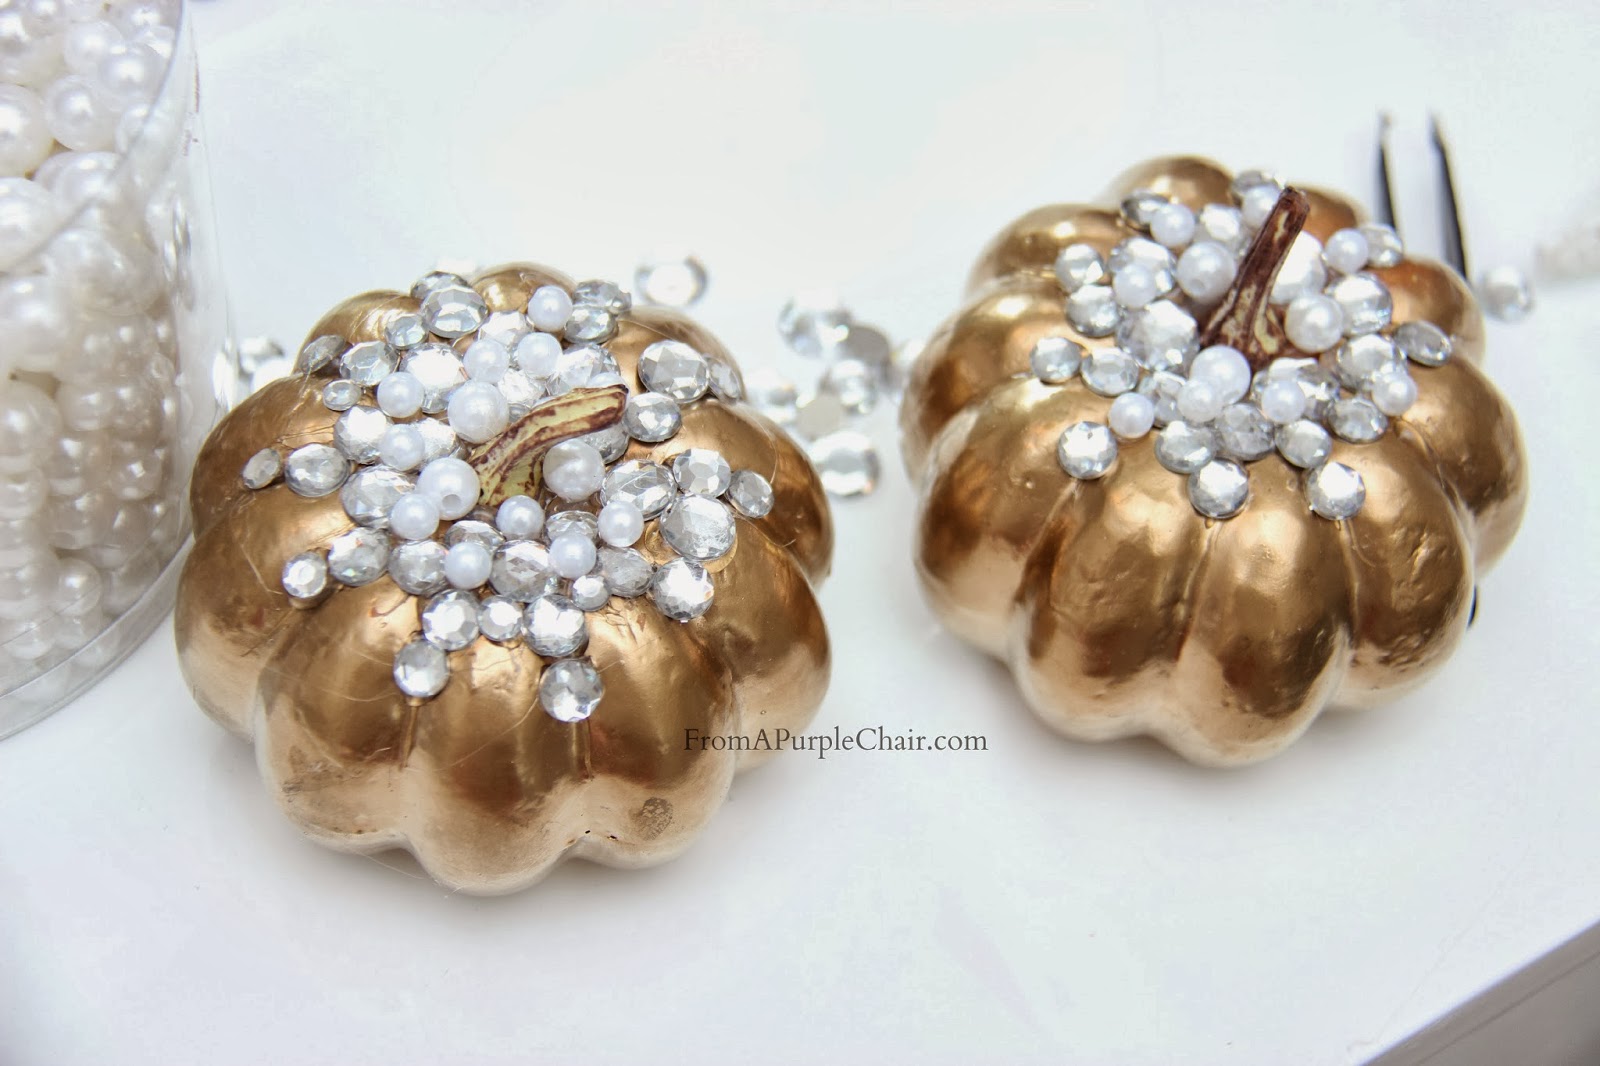
I really love how they turned out. I will be using them for a Thanksgiving center piece arrangement (stay tuned for a future post on this 🙂

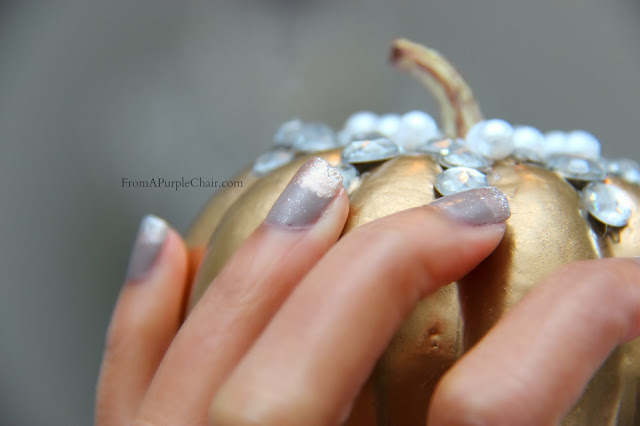
No glitzy pumpkin is complete without a matching mani!
I used OPI Berlin there Done that and a rose gold color from VS on the tip along with Glinda by Marc Jacobs
xo Liz ♥
These are so cute and festive 🙂 and whats great is that it doesn't seem like it was hard to do! thanks for sharing this idea for some great decor 😀
xoxo, charlene
Great idea! Love it!